Controlling DC Motor using L298N and Arduino UNO
Remote controlled and autonomous cars fascinate everyone. And being able to understand their working, and most importantly, being able to make them is a wonderful skill and experience. But, before we jump onto that, it's important to learn about two key components of such cars, MOTORS, and MOTOR DRIVERS.
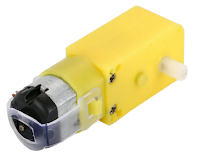
Explaining in the simplest possible way, MOTORS are output devices used to rotate wheels, by using electrical power.We will now make a simple project, in which we will control our motor's direction using a motor driver, L298N.
Hardware Components Required
1- L298N Motor Driver
2- Arduino
3- Motor
4- Wheel
5- Jumper Cables
6- Battery (9V)
Checking Motor and Motor Driver
Before starting any project, make sure your hardware is working correctly. The following method may be used to check for motor and motor driver's basic working.
Motor
Patch the circuit as shown in the image below. If the motor turns on, and the attached wheel rotates, then your motor is working correctly.
Motor Driver
Patch the circuit as shown in the following image. If the light in the module turns on, then the basic working of L298N is fine. In some cases, you may need to do a deeper diagnostic test, depending on the situation. In that case, you may contact us for proper testing methods.
Hardware Setup
Software Setup
Demo
After learning the basics, we are now ready to make our 1st car. Stay tuned for our next video, and if you have any queries feel free to ask us in the comment section. :)


Comments
Post a Comment